> ## Documentation Index
> Fetch the complete documentation index at: https://sequence-0fb8d9e6-api_docs.mintlify.site/llms.txt
> Use this file to discover all available pages before exploring further.
# How to Deploy an Item Collection Contract in Sequence Builder
> This guide provides a detailed walkthrough on setting up and deploying a Web3 Game Item contract in Builder. It discusses the differences between ERC721 and ERC1155 contracts, walks through the steps of deploying a contract.
This guide walks through how to setup and deploy a Web3 Game Item contract in Builder.
Prerequisite: Create a Project
This guide assumes that you have already [signed up for Builder and created a Project](/solutions/builder/getting-started).
#### ERC721 vs. ERC1155
Both contracts mint NFTs, but ERC721, being the earlier standard, has gained widespread adoption, particularly in digital collectibles. Known for its simplicity and ease to audit for security, ERC721 tokens are distinct, contributing to their recognition in various NFT marketplaces. Typically you would use an ERC721 contract if: you're dealing with the single same asset, multiplied, or a multiplicity of 1 item with many in a collection
Example `ERC721`: [Azuki](https://etherscan.io/token/0xed5af388653567af2f388e6224dc7c4b3241c544)
In contrast, ERC1155 offers versatility with efficient batch operations for both fungible and non-fungible tokens in a single contract, where typically you would be dealing with a multiplicity of a many items to many quanties relationship. However, this flexibility introduces complexity, necessitating careful security attention.
Example `ERC1155`: [Skyweaver](https://polygonscan.com/token/0x631998e91476da5b870d741192fc5cbc55f5a52e)
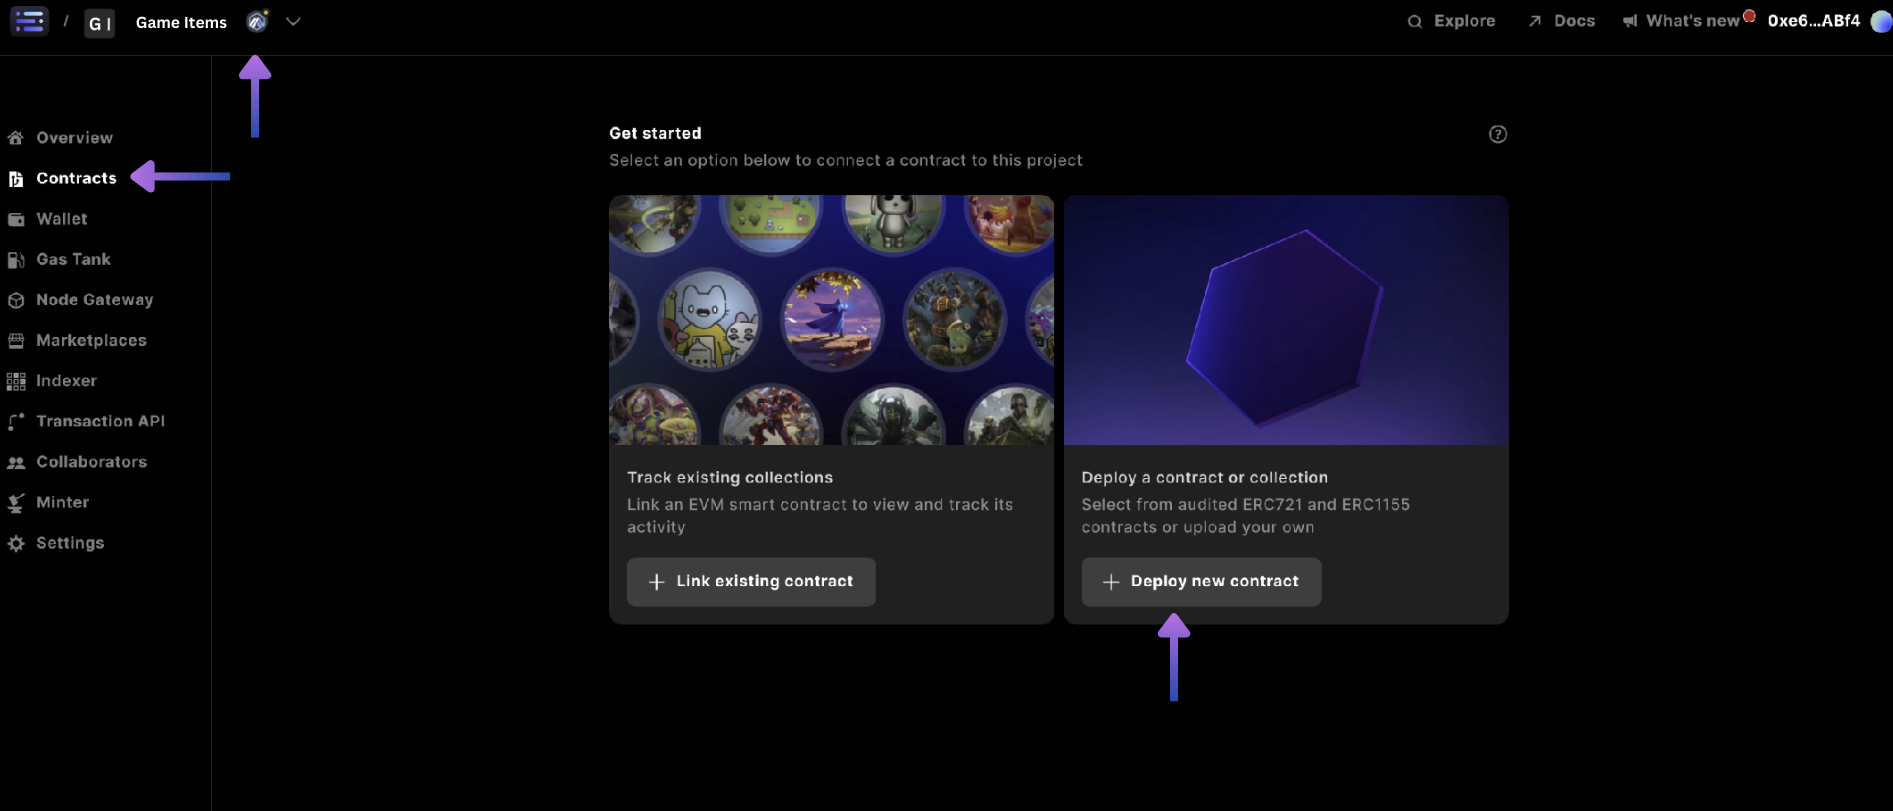
## Step 1: Navigate to contracts
Start by selecting your `project` in the top left and corner for what you want to create the collectible for, and head to the `contracts` section and select `+ Deploy new contract`
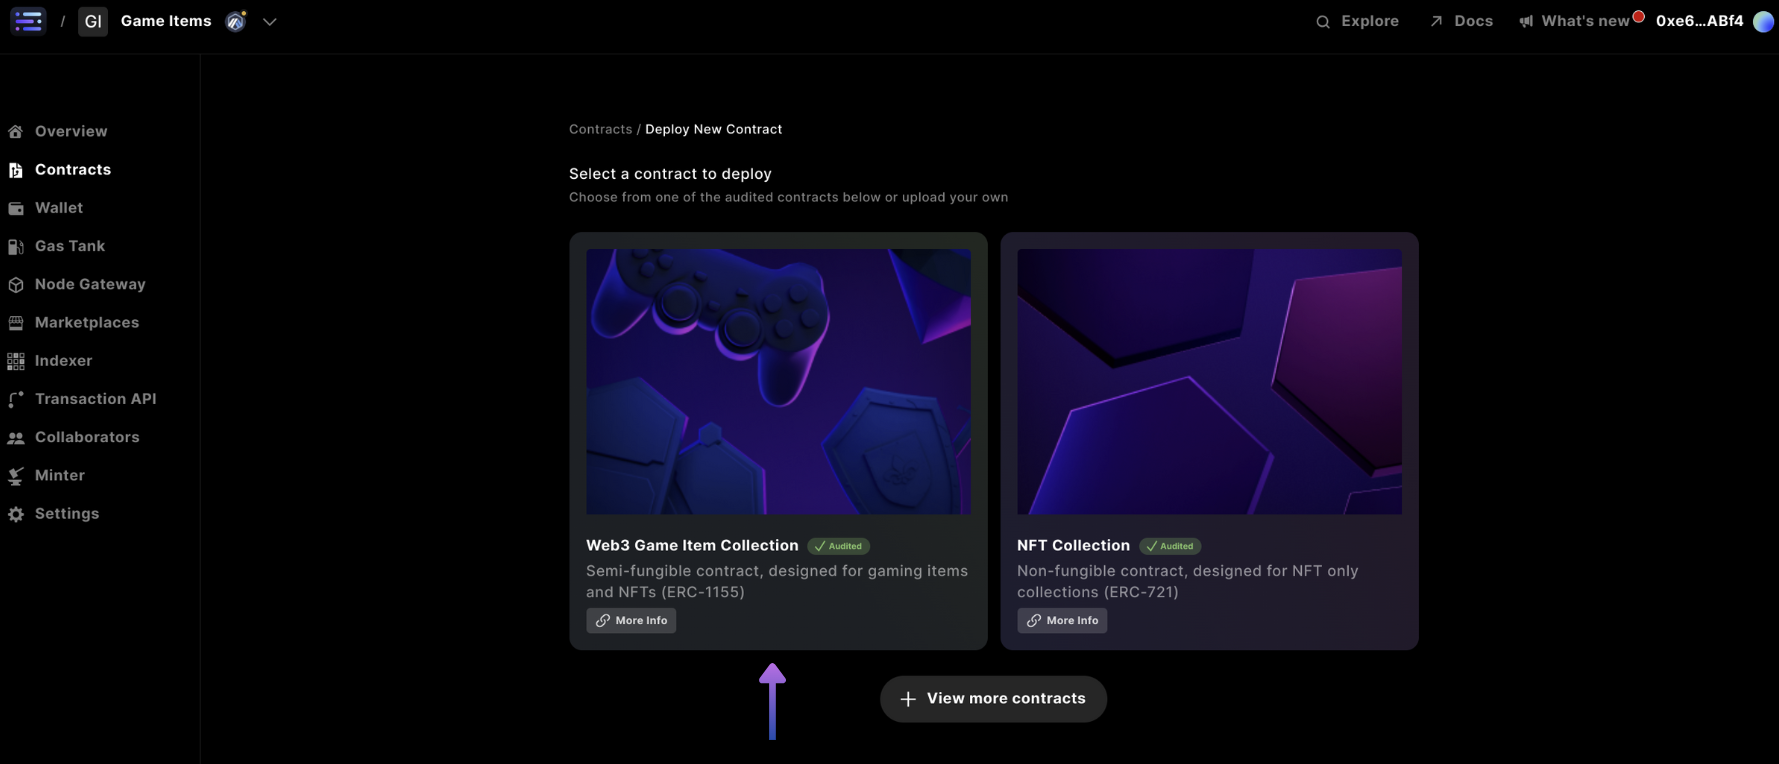
 ## Step 2: Choose your collectible type
Then make your choice of Web3 Game Item Collection (ERC1155) or NFT Collection (ERC721), for this example we'll walk you through a Web3 Game Item Collection (ERC1155)
## Step 2: Choose your collectible type
Then make your choice of Web3 Game Item Collection (ERC1155) or NFT Collection (ERC721), for this example we'll walk you through a Web3 Game Item Collection (ERC1155)
 The only difference in deployment between an `ERC1155` vs `ERC721` is that you
add a `symbol` to an ERC721 NFT Collection
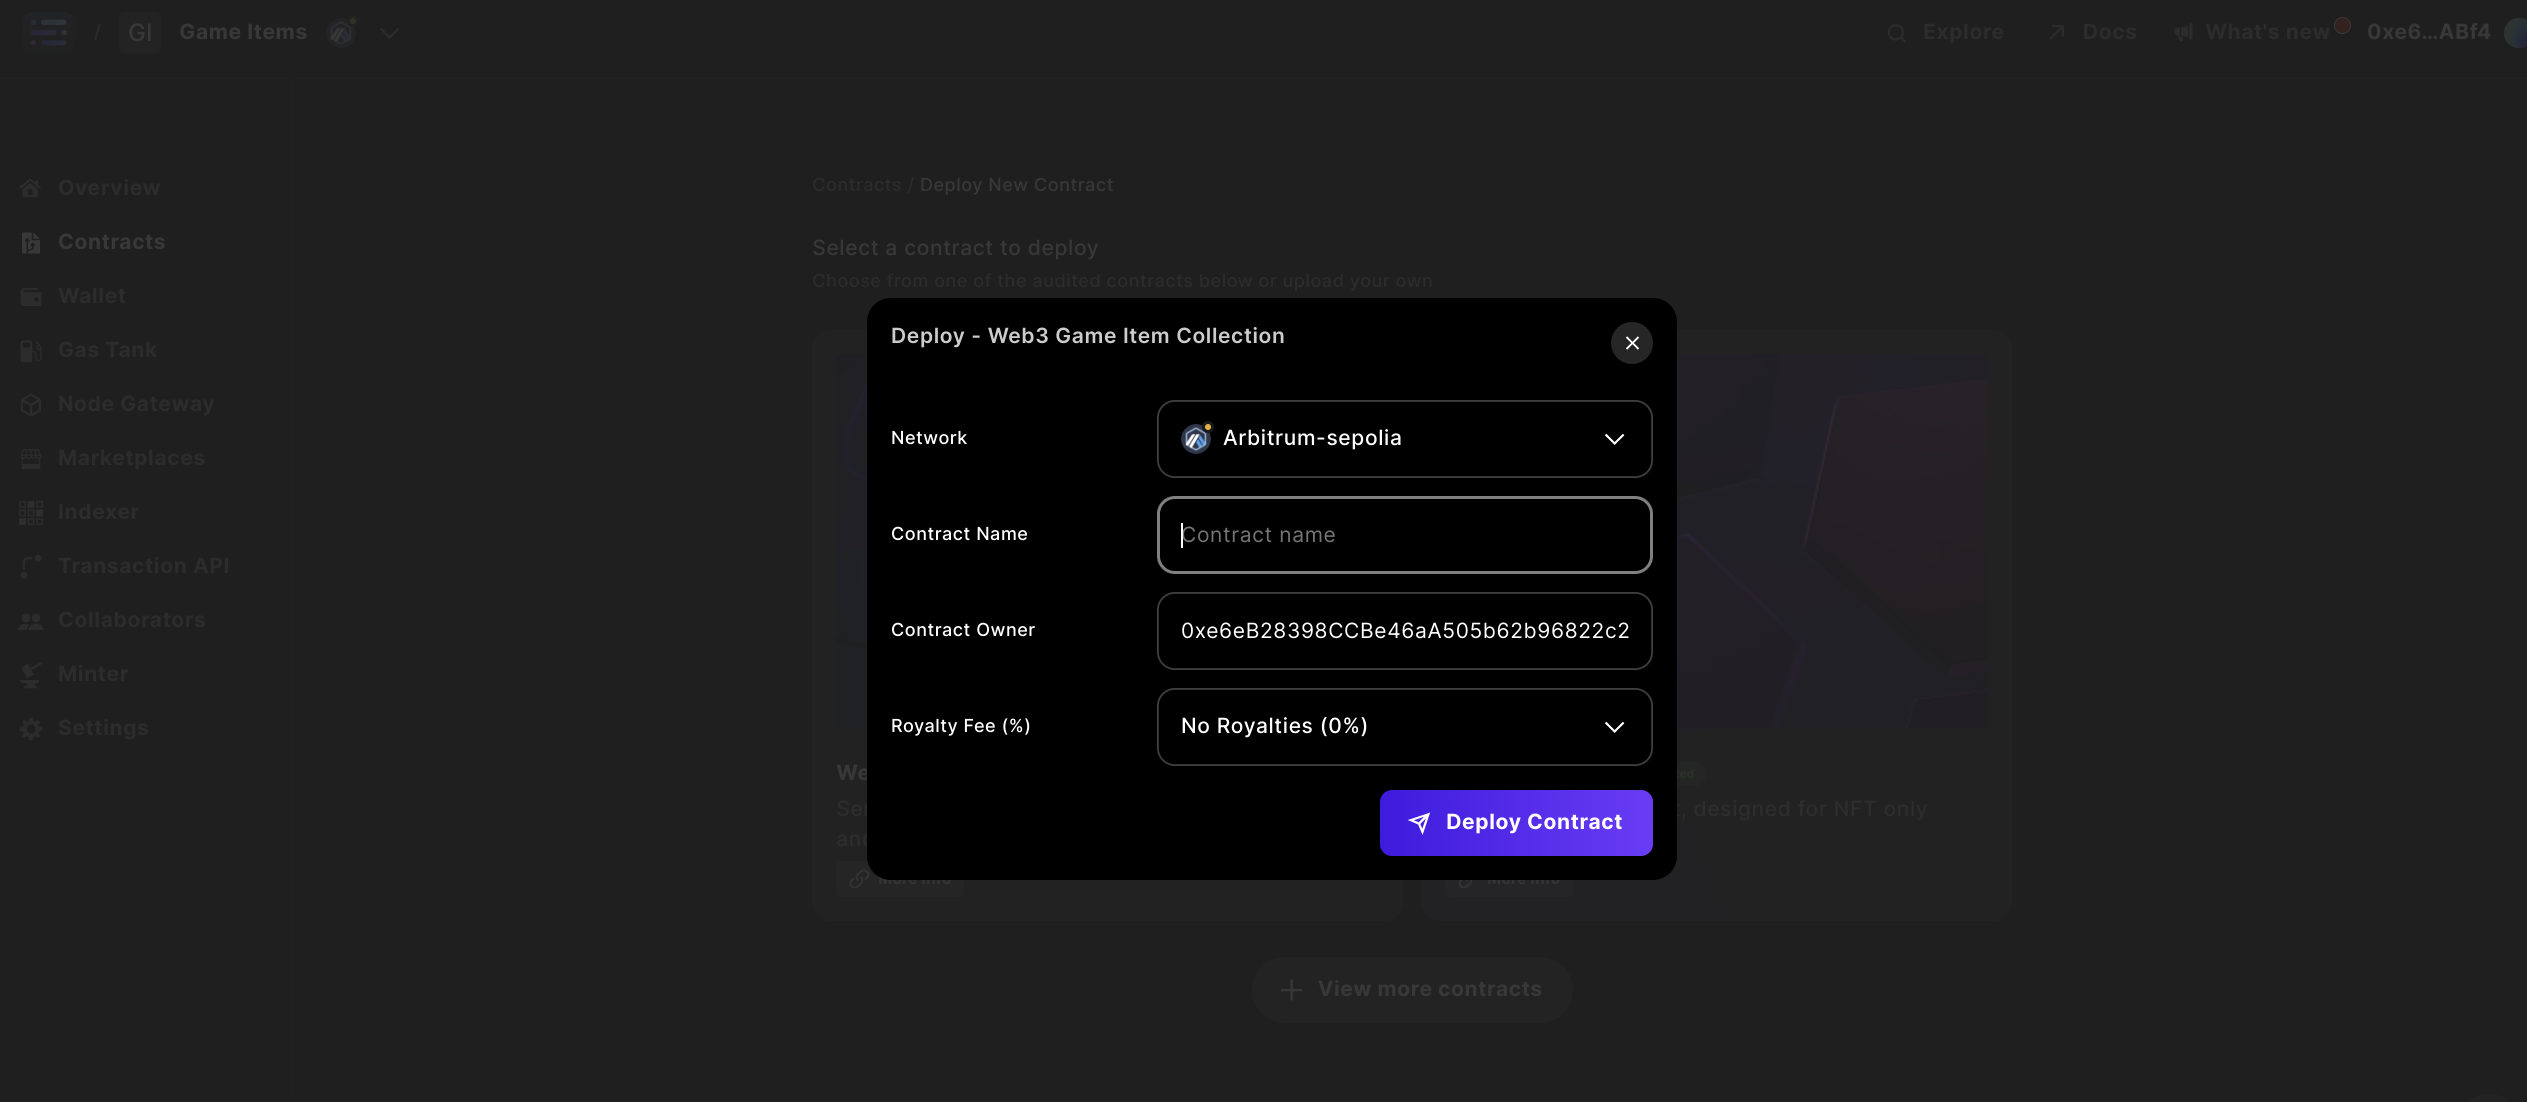
## Step 3: Specify contract details
Complete the contract details by specifying a `Contract Name` and `Owner` for your contract, with the option to input Royalties. Make sure the Owner address is the Sequence Wallet in the top-right hand corner and that you have funds in this wallet on mainnet, otherwise on testnet - we sponsor these transactions for you.
The only difference in deployment between an `ERC1155` vs `ERC721` is that you
add a `symbol` to an ERC721 NFT Collection
## Step 3: Specify contract details
Complete the contract details by specifying a `Contract Name` and `Owner` for your contract, with the option to input Royalties. Make sure the Owner address is the Sequence Wallet in the top-right hand corner and that you have funds in this wallet on mainnet, otherwise on testnet - we sponsor these transactions for you.
 Note:
While you can change the `name` later in the builder interface where it will update across the sequence stack, popular explorers do not reindex the information, so what you put first remains
## Step 4: Deploy your contract
Deploy your contract from the popup window at [http://sequence.app/sign-transaction](http://sequence.app/sign-transaction), and sign the message by selecting `confirm`
Note:
While you can change the `name` later in the builder interface where it will update across the sequence stack, popular explorers do not reindex the information, so what you put first remains
## Step 4: Deploy your contract
Deploy your contract from the popup window at [http://sequence.app/sign-transaction](http://sequence.app/sign-transaction), and sign the message by selecting `confirm`
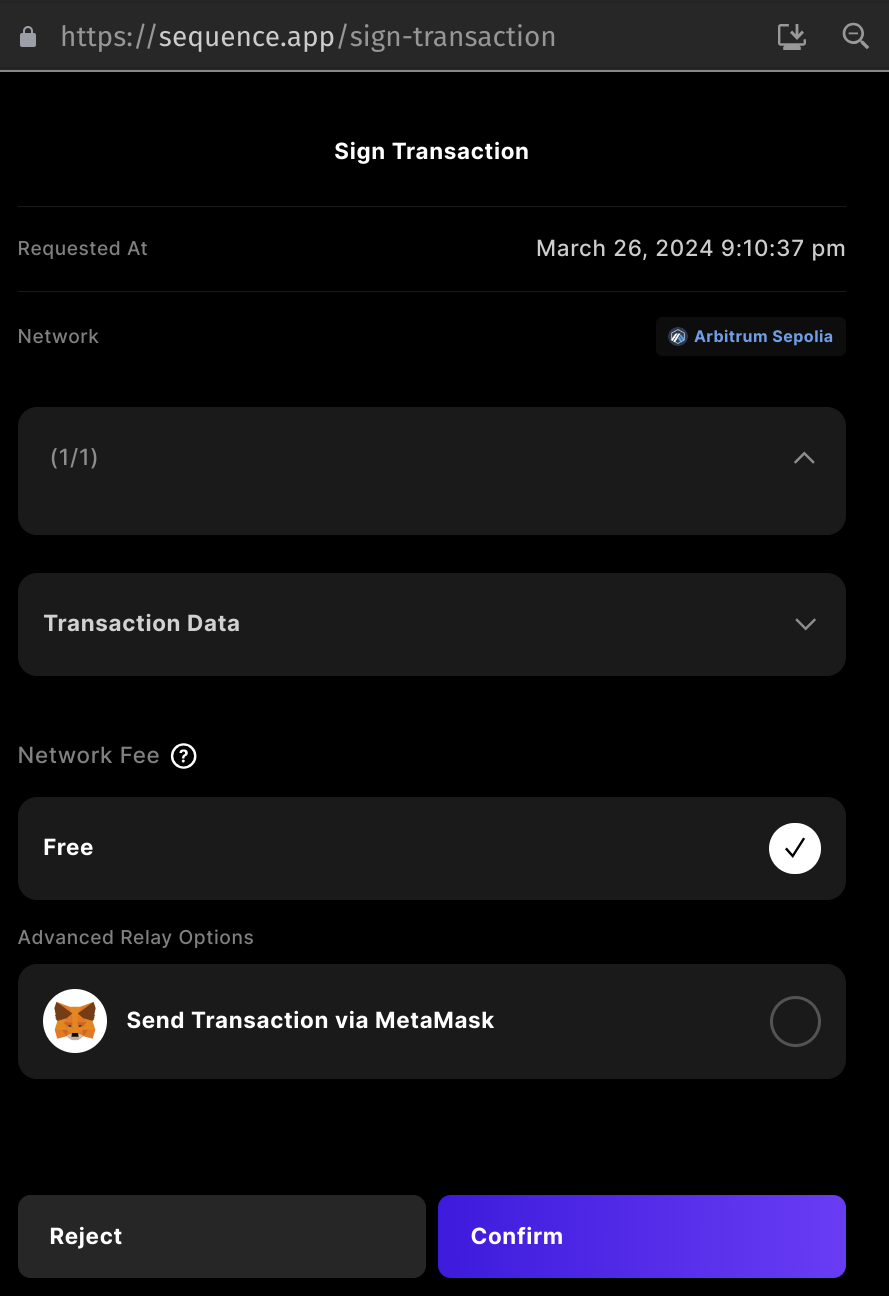 All testnets will be free to transact on.
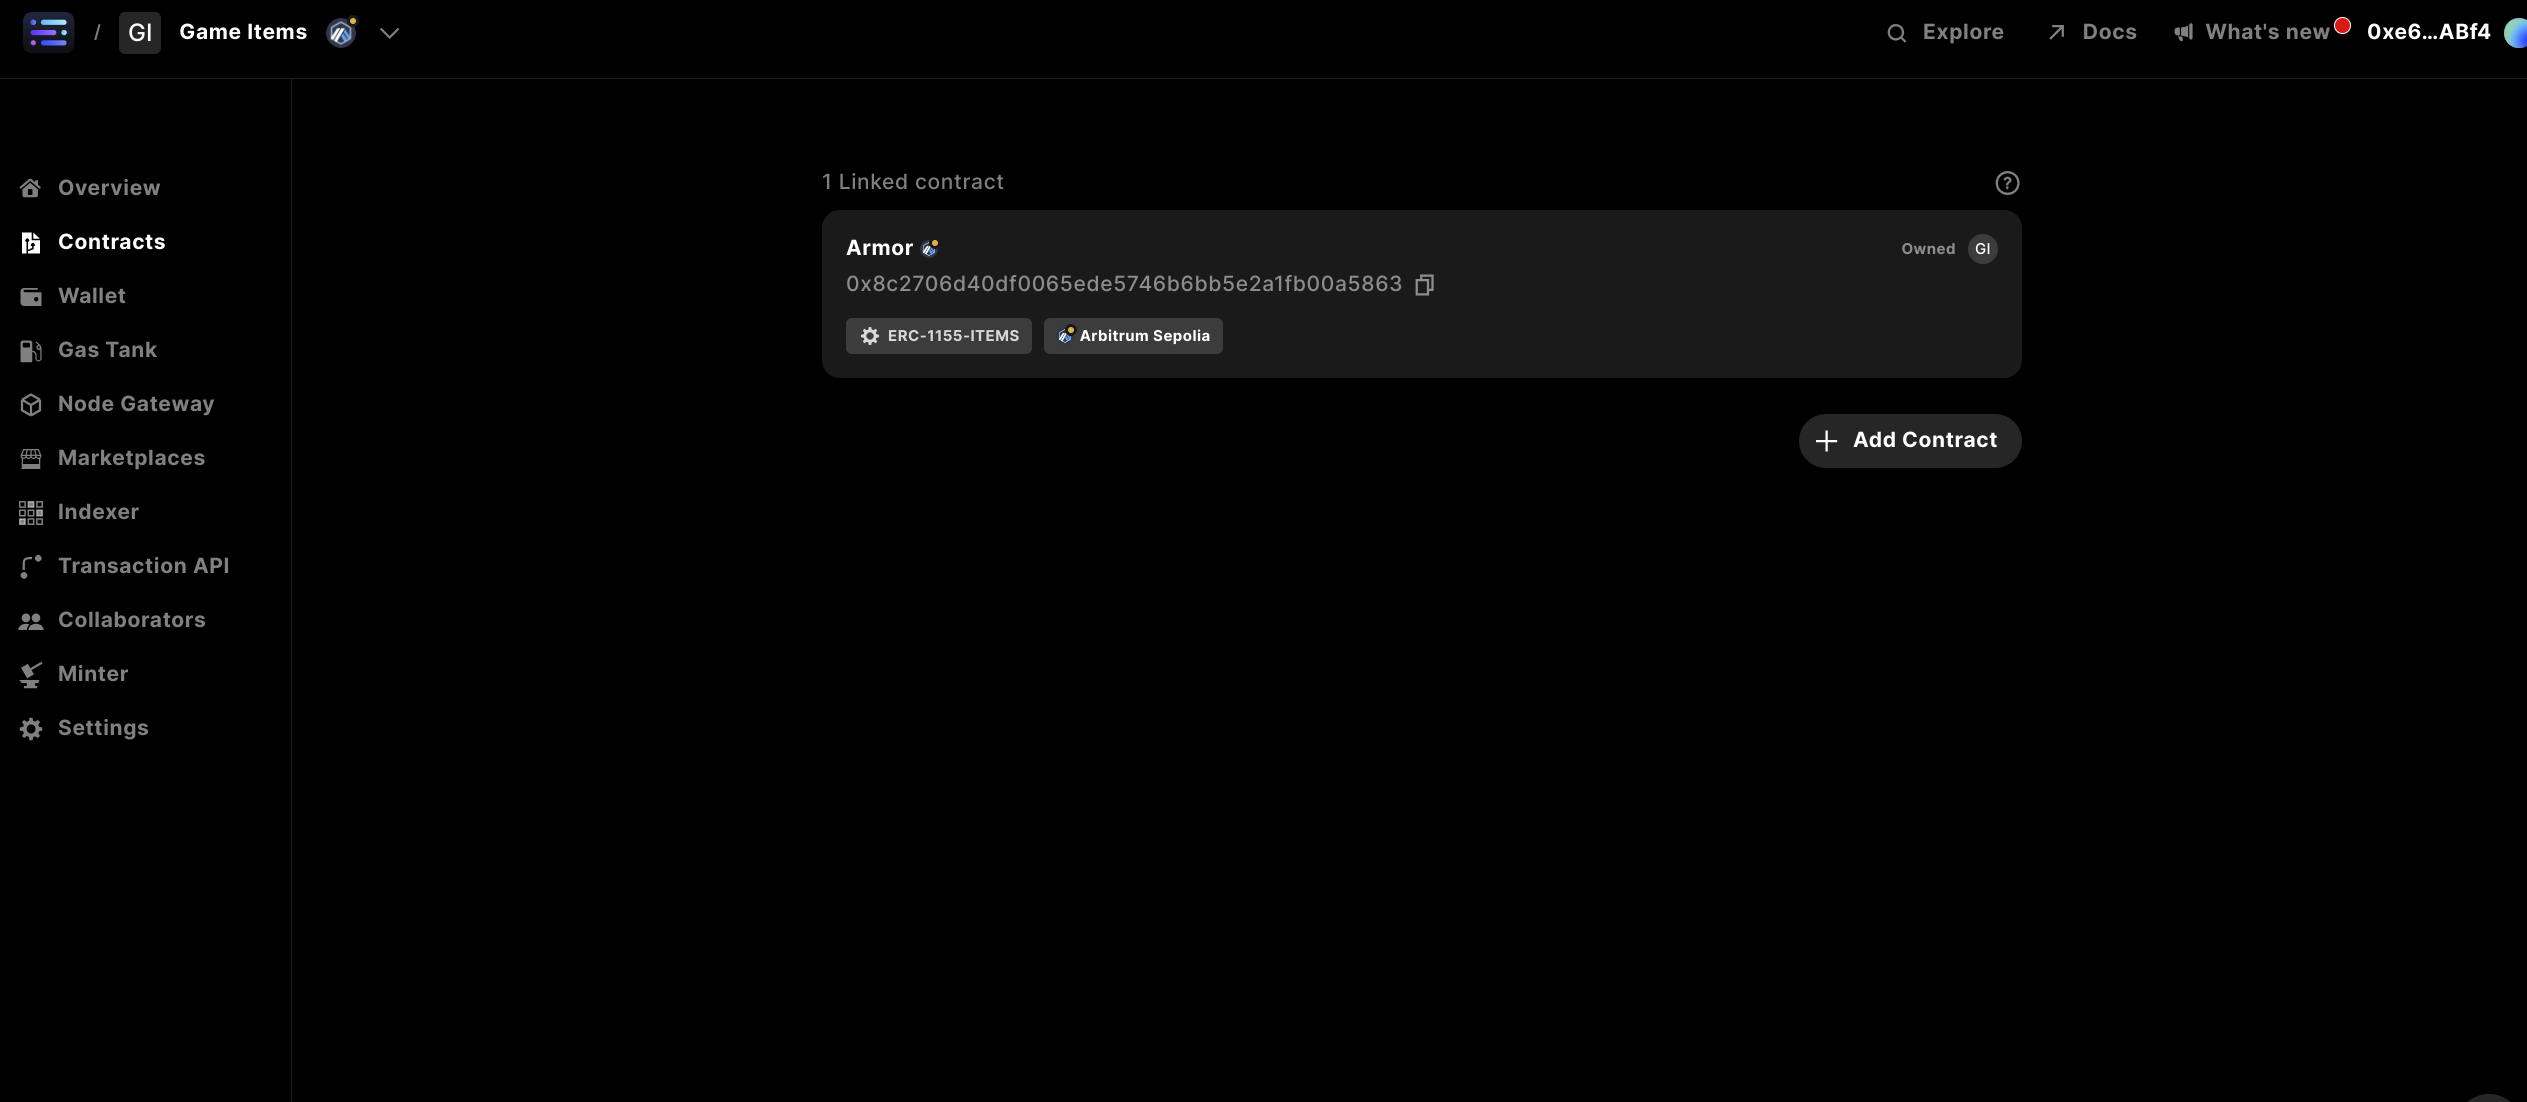
### Optional: Add a Minter Role to the contract
Sequence contracts have Access Control options by default. In some cases, you may want to grant a specific address permissions in order to call various functions such as `mint()`.
First start by selecting your contract you just deployed in the `contracts` section
All testnets will be free to transact on.
### Optional: Add a Minter Role to the contract
Sequence contracts have Access Control options by default. In some cases, you may want to grant a specific address permissions in order to call various functions such as `mint()`.
First start by selecting your contract you just deployed in the `contracts` section
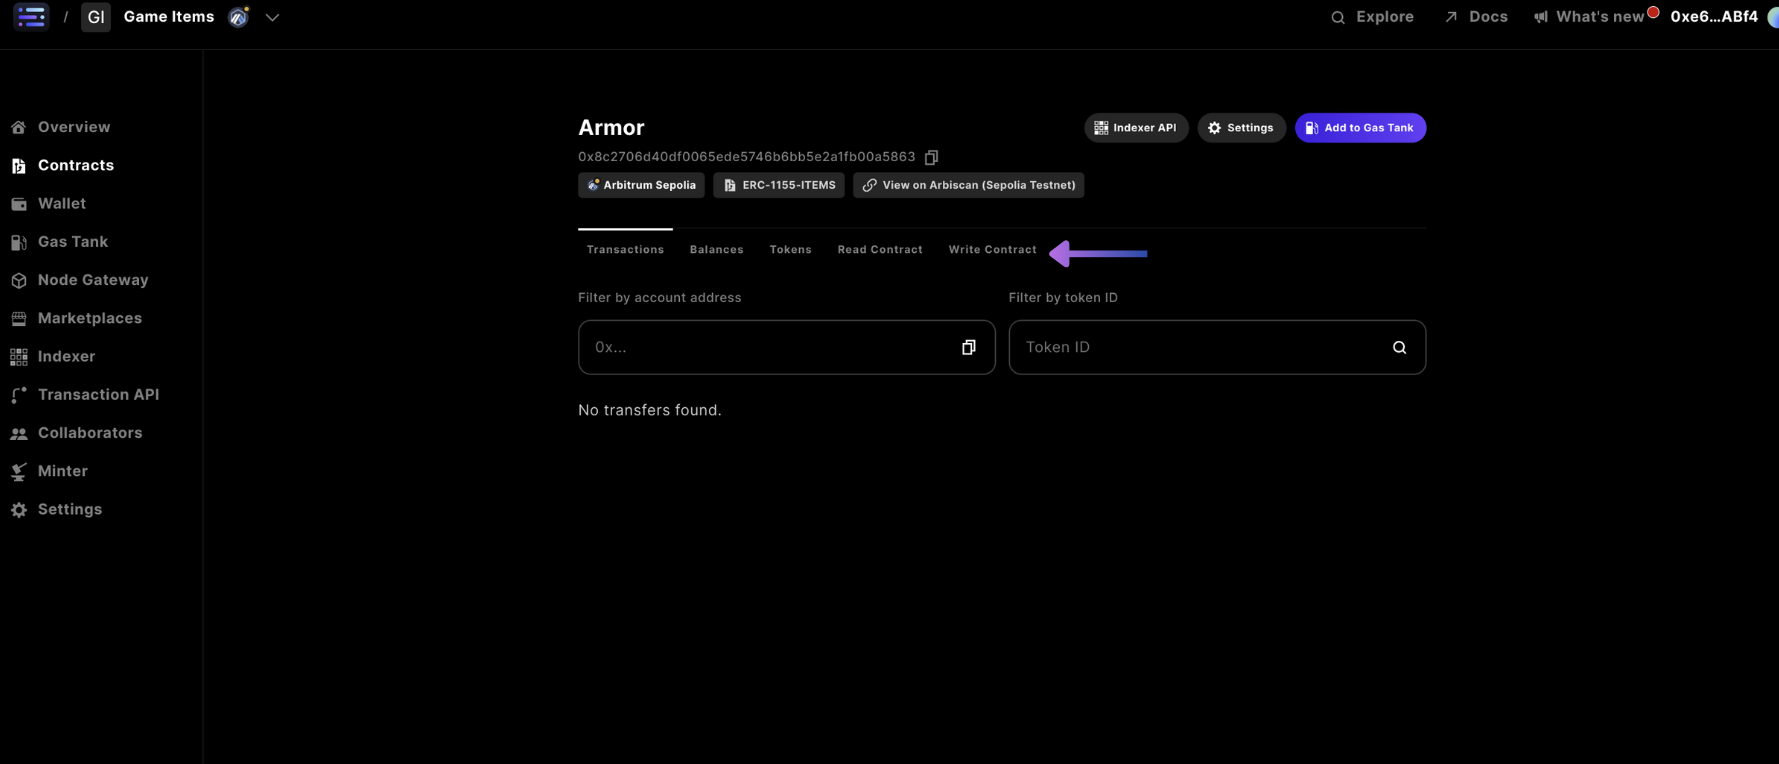
 Next, head to the `Write Contract` section
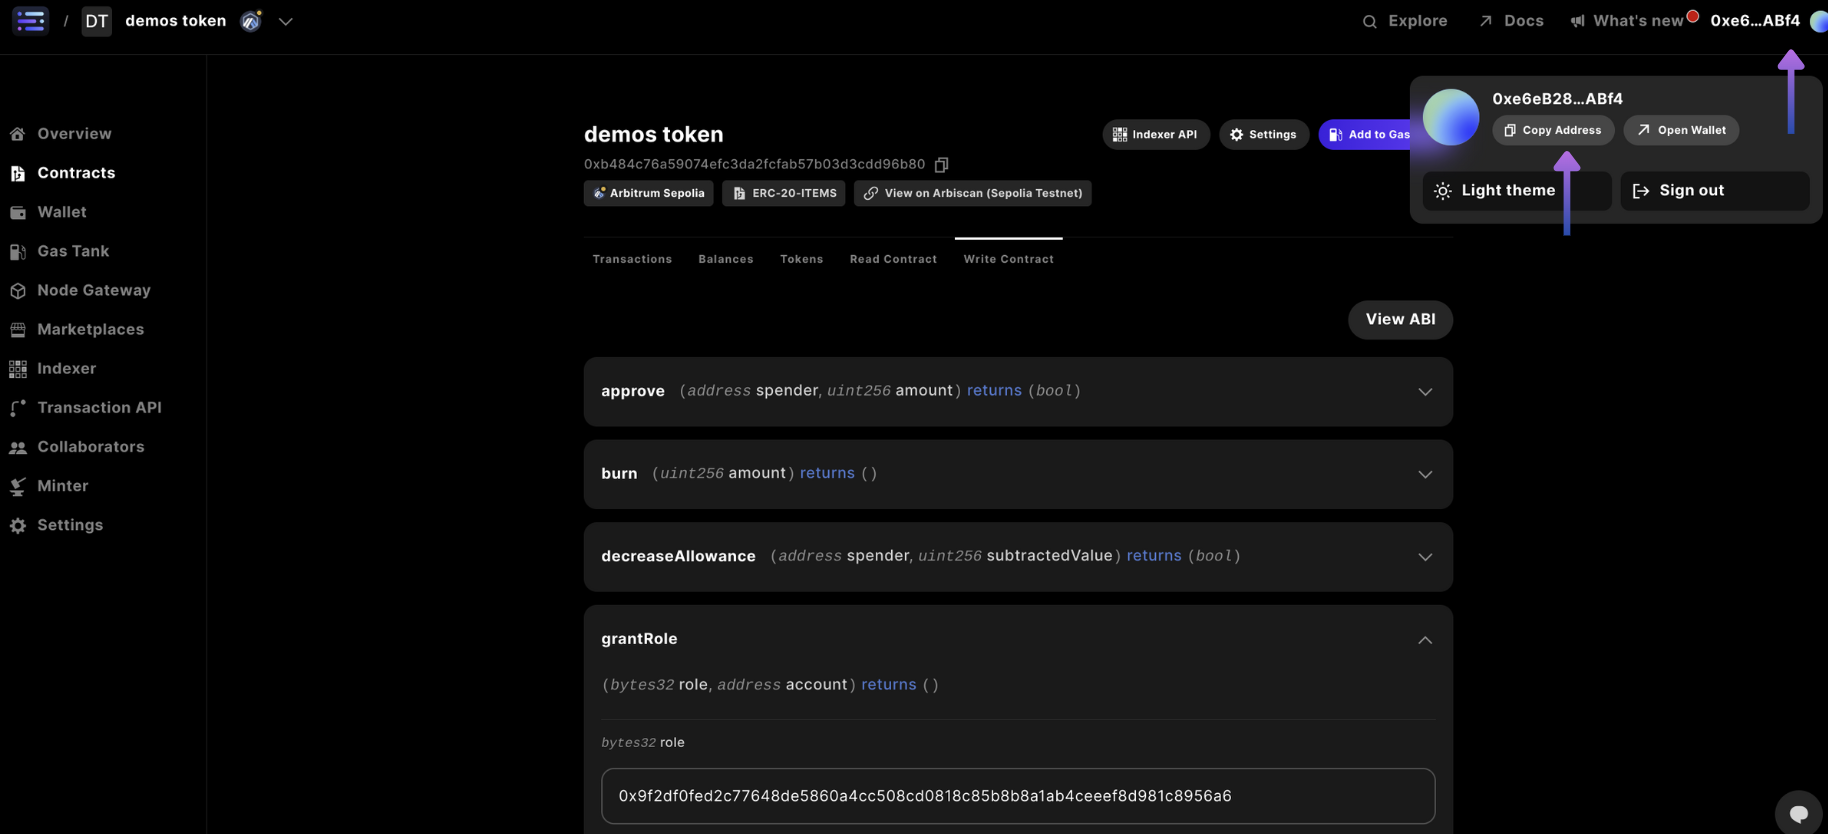
 In the `grantRole` section of the write contract tab navigation
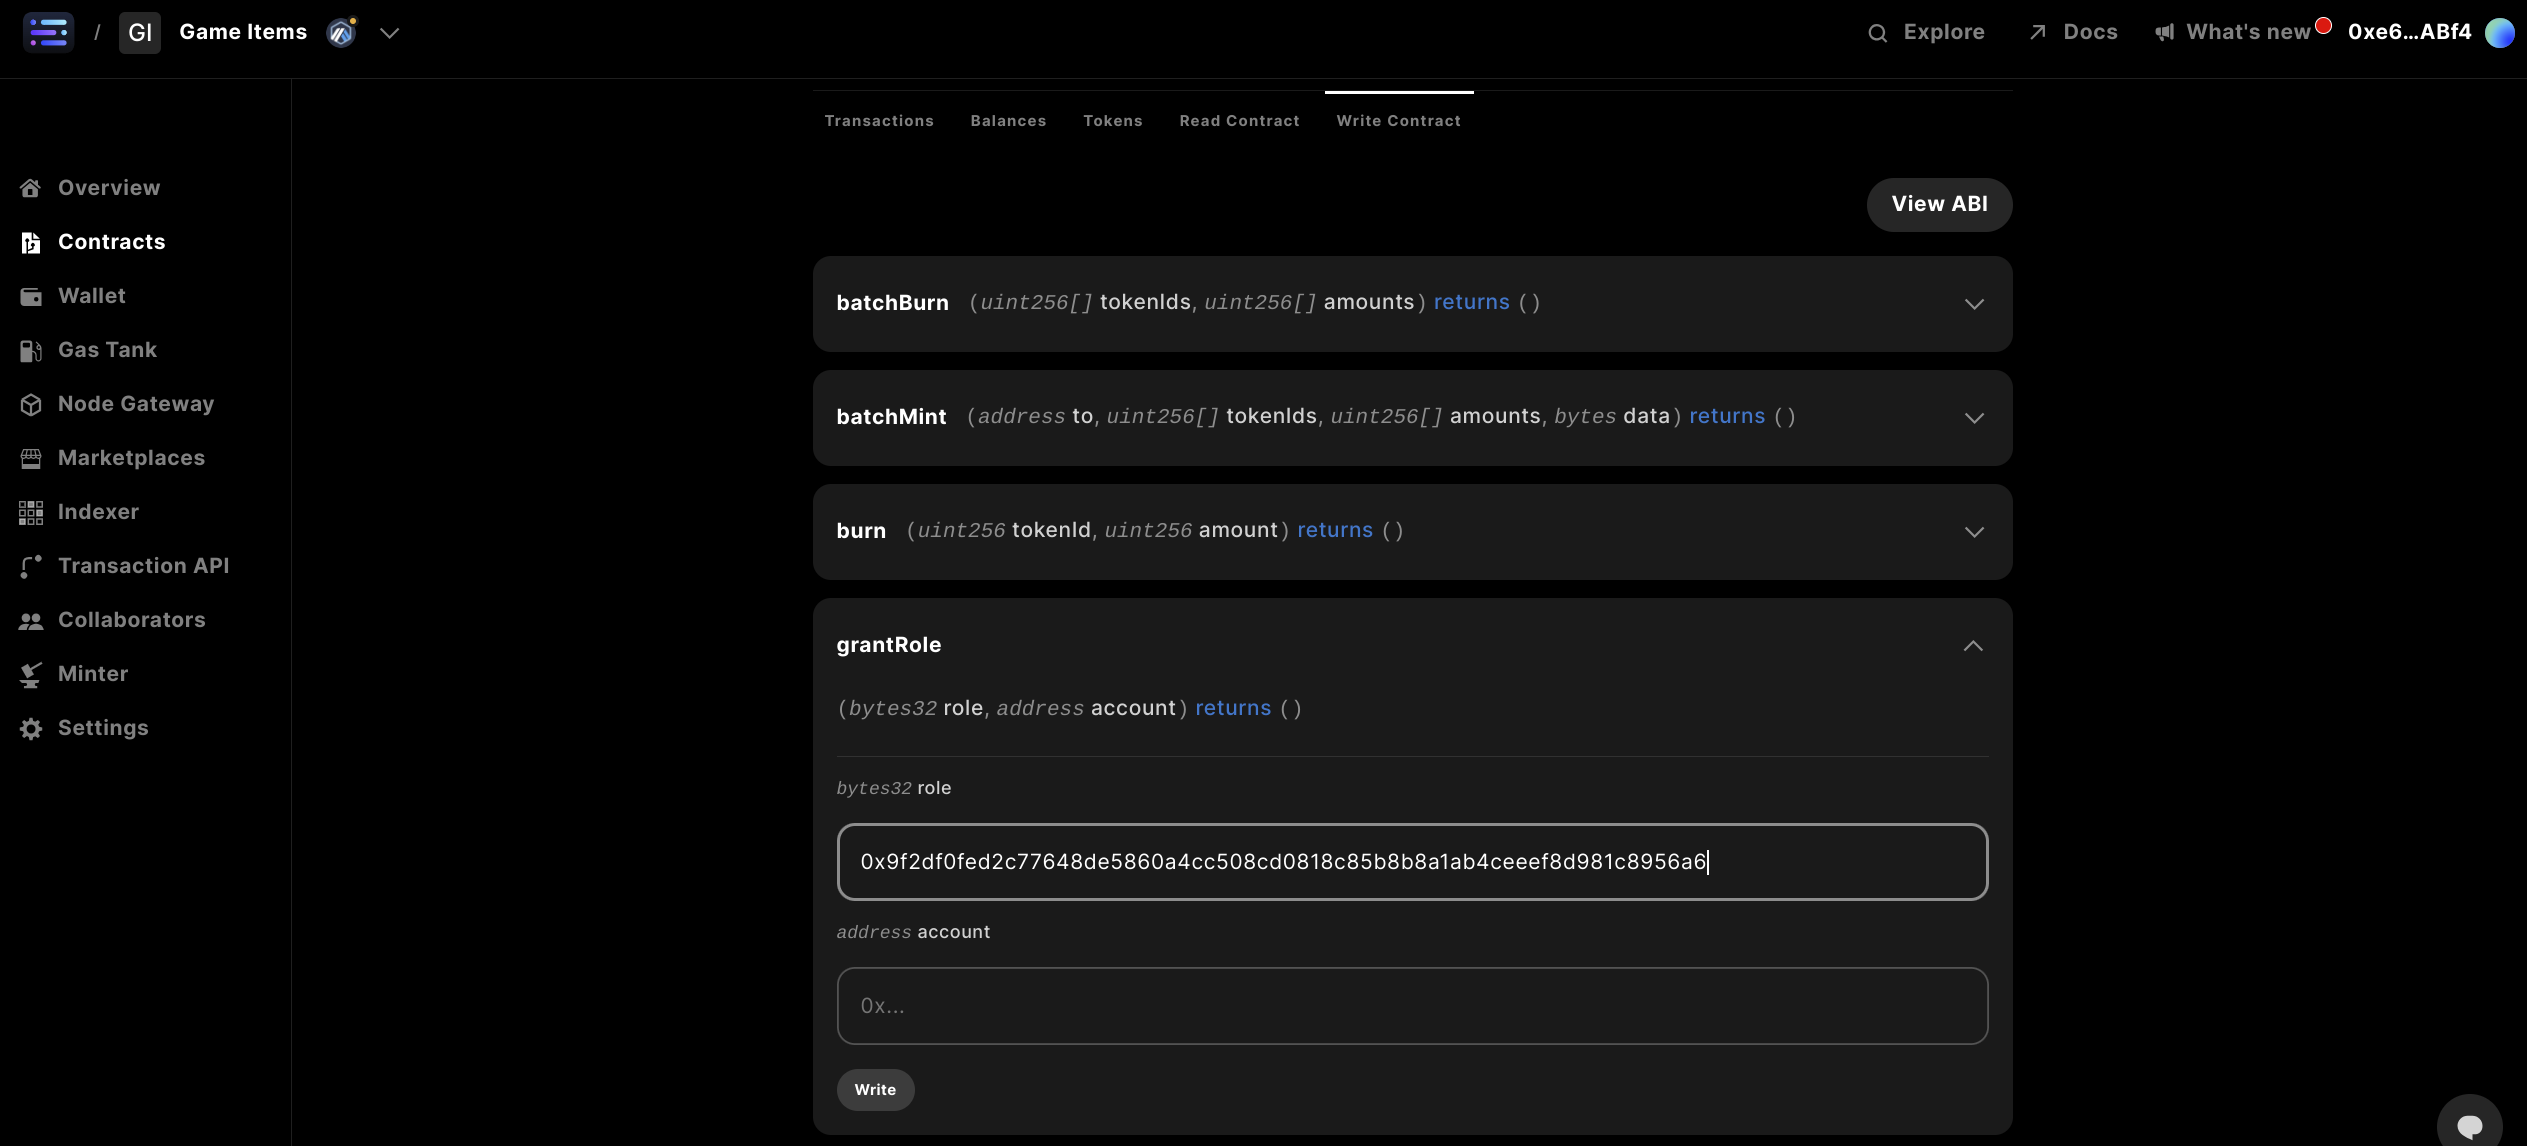 Complete with the following details:
`bytes32 role`: `0x9f2df0fed2c77648de5860a4cc508cd0818c85b8b8a1ab4ceeef8d981c8956a6`
`address account`: ``
Where the wallet address is the address that you would like to give permissions to mint to, specifically any Sequence wallet.
Complete with the following details:
`bytes32 role`: `0x9f2df0fed2c77648de5860a4cc508cd0818c85b8b8a1ab4ceeef8d981c8956a6`
`address account`: ``
Where the wallet address is the address that you would like to give permissions to mint to, specifically any Sequence wallet.
 Complete by selecting `write` and signing the transaction in the popup window, like before
With a confirmation message showing `Response Success`
The role string inputted is the result of `solidityPackedKeccak256("MINTER_ROLE")` in
solidity or `ethers.solidityPackedKeccak256(ethers.toUtf8Bytes("MINTER_ROLE"))`
in javascript
It's a typical pattern to use offchain compute like a cloudflare worker with a
relayer wallet sending transactions, which would be inputted in the account
field, more on how to accomplish this
[here](/guides/mint-collectibles-serverless#mint-collectibles-using-a-gasless-serverless-transactions-api)
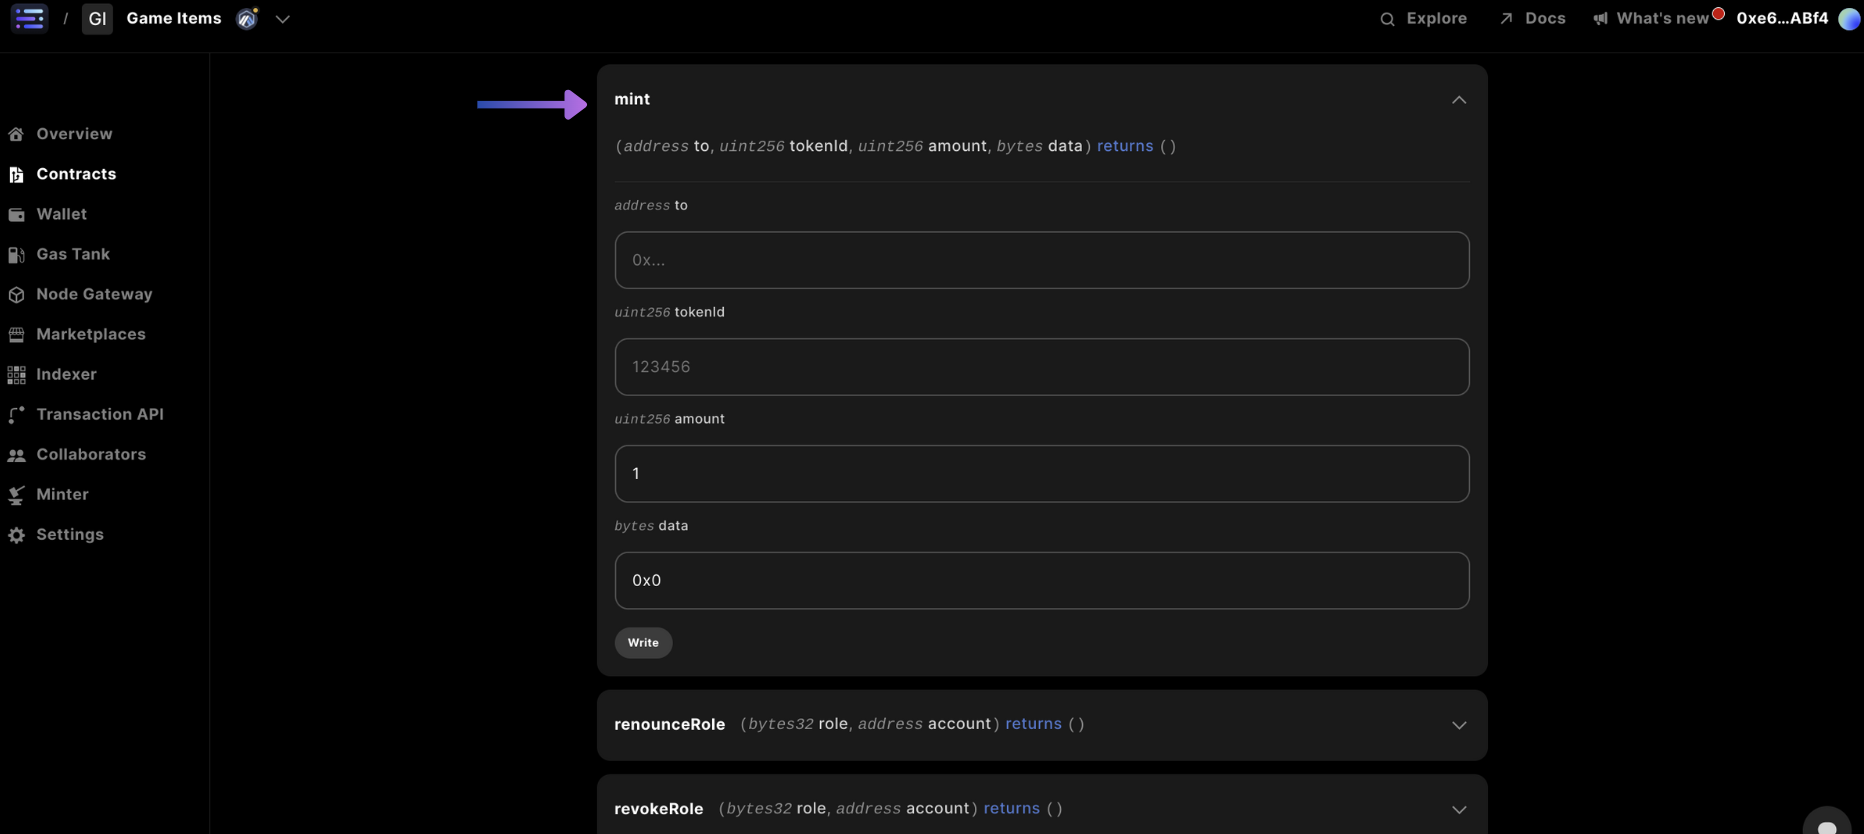
## Step 6: Mint tokens to your wallet address
Navigate to the `mint` card in the `Write Contract` section and input the `to` being the wallet address you would like to receive the token to, the `tokenId` (typically starting at 0), and `amount` of tokens, and finally the `data` section you can just input `0x00`, which typically represent Additional data with no specified format.
Complete by selecting `write` and signing the transaction in the popup window, like before
With a confirmation message showing `Response Success`
The role string inputted is the result of `solidityPackedKeccak256("MINTER_ROLE")` in
solidity or `ethers.solidityPackedKeccak256(ethers.toUtf8Bytes("MINTER_ROLE"))`
in javascript
It's a typical pattern to use offchain compute like a cloudflare worker with a
relayer wallet sending transactions, which would be inputted in the account
field, more on how to accomplish this
[here](/guides/mint-collectibles-serverless#mint-collectibles-using-a-gasless-serverless-transactions-api)
## Step 6: Mint tokens to your wallet address
Navigate to the `mint` card in the `Write Contract` section and input the `to` being the wallet address you would like to receive the token to, the `tokenId` (typically starting at 0), and `amount` of tokens, and finally the `data` section you can just input `0x00`, which typically represent Additional data with no specified format.
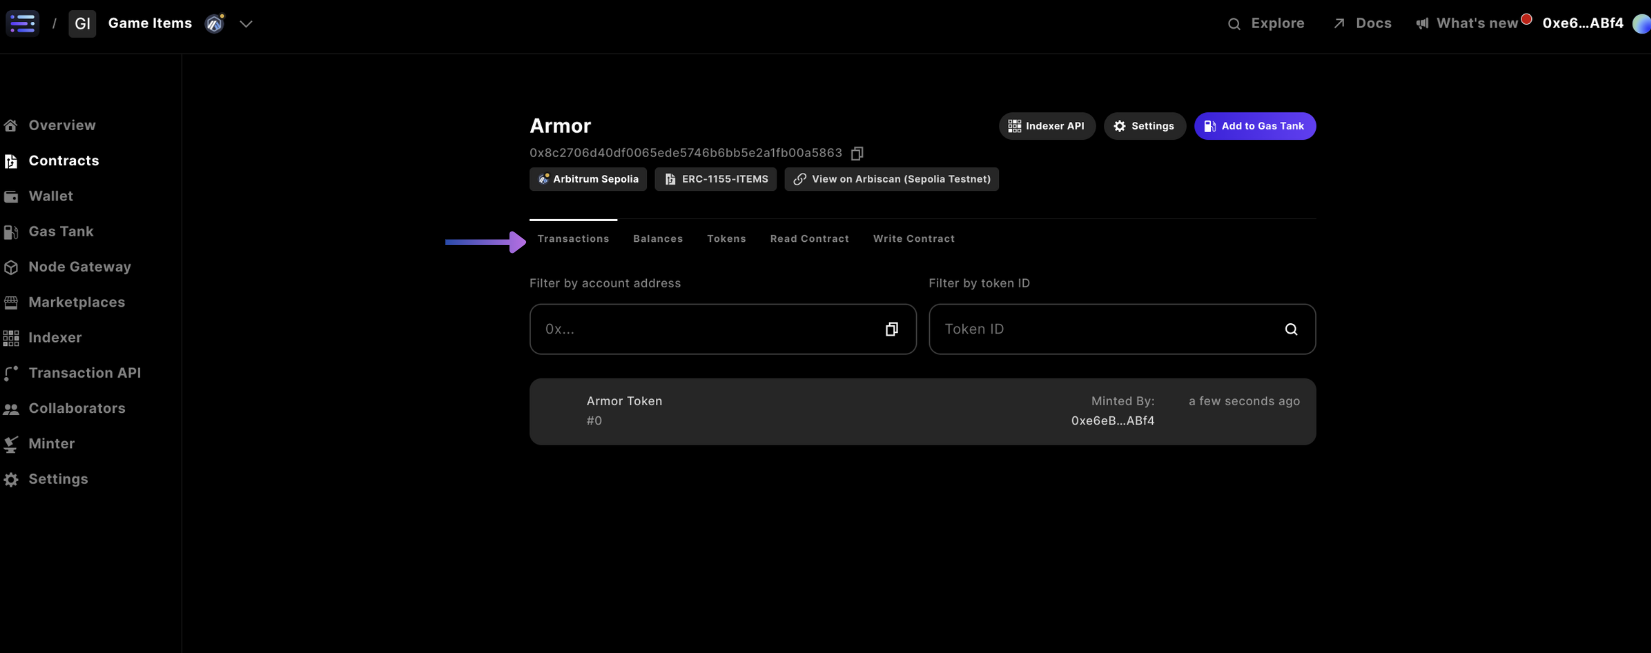
 ## Step 7: Confirm your minted collectible
And you're done!
You can view the transactions submitted to the blockchain for your wallet address in the `Transactions` tab navigation
## Step 7: Confirm your minted collectible
And you're done!
You can view the transactions submitted to the blockchain for your wallet address in the `Transactions` tab navigation